30 November 2015

Grumman XF10F-1 Jaguar Model

1. Introduction
1.1. Aircraft
Grumman XF10F-1 Jaguar
Prototype carrier-based swing-wing fighter aircraft (information in Wikipedia)
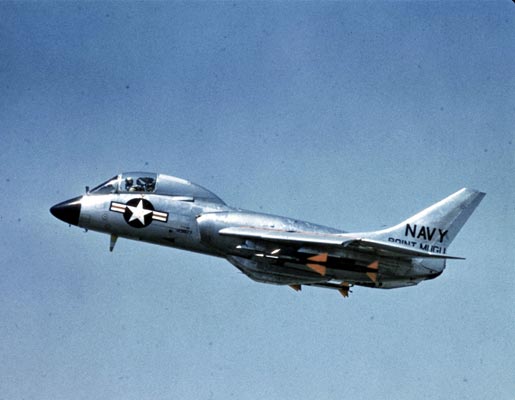
U.S. Navy. BuNo 124425.
Muroc Dry Lake, USA, May 1952.

1.2. Story
The story behind my small vignette is as follows. The Jaguar has just landed after completing one of its test flights, all of which took place at Muroc Dry Lake (adjacent to Edwards Air Force Base). A minor problem has developed during the flight (which, according to the pilot, Mr. Corwin Meyer, was entirely normal for the Jaguar – see source [1]), resulting in the aircraft coming to rest slightly further from the usual place. A member of the ground crew nearest to the spot has immediately driven up and is asking the pilot whether any help is required (a tow tractor to the apron, perhaps?).

2. Kit Overview
The XF10F-1 Jaguar from Planet Models (cat. # 171) is a fully resin kit; it comes with a vacu-formed canopy and a set of landing gear legs made of "strengthened" resin. The quality of casting is good, although the fuselage halves of my sample were slightly warped. The resin parts have smooth surface with recessed panel lines which are a bit too deep, but still passable.

The kit presents the XF10F-1 Jaguar in its initial configuration – i.e., original free-floating horizontal stabilizer is in place (swapped for a conventional one prior to the 29th flight), there are no horizontal ventral fins and no speed brakes on the aft fuselage (installed prior to the 17th flight). Keeping this in mind, the accuracy of the kit can be assessed as more or less acceptable out of the box. The cockpit detail is not bad, but the wheel wells are bare. A number of small details seen on the real XF10F-1 are missing, such as T-shaped probes and vertical strakes on the lower forward fuselage. However, the most important issue is the leading edge slats. When the Jaguar is on the ground, its wing is always (at least on all available historical photographs) in the takeoff and landing position, meaning the minimum sweep. And in the minimum sweep position the leading edge slats extend automatically. The kit's wings have no separate slats (which is, alas, true for so many other decent model kits).

There is one other grudge. The manufacturer could have given more thought to the question of joining the kit parts together. The way to glue the wings to the fuselage that the manual suggests is simply unworkable.

3. Construction
3.1. Building
All in all, when building my model I have added the following fully scratch-built items:
- Extended leading edge slats, as my model was indented to be presented sitting on the ground.
- Clear wingtip navigation lights.
- Intake channels interior walls.
- Engine exhaust pipe.
- Landing gear well interior.
- Wiring, tie-down rings, scissor links on the landing gear legs.
- Interior detail on the landing gear doors.
- Nose wheel disks (there should be 8 spokes per wheel disc while the kits offers 6 spokes)
- Pitot tube with plus two small T-shaped probes (adjacent to intake lower lips).
- Small ventral strakes (lower forward fuselage).
- Miscellaneous cockpit detail: some equipment aft of the ejection seat; throttle lever; canopy handles.
Instead of following the unfeasible recommendation on the manufacturer's instruction sheet, I joined all major parts of the model – the fuselage, the wings, the vertical fin and the horizontal stabilator - by means of drilling holes and inserting metal reinforcing rods.

3.2. Painting & Markings
Painting and markings have been done after careful study of historical photographs from the source [1]. The paint job is relatively straightforward: the aircraft is Dark Sea Blue overall with a number of natural metal items (intake lips; wing, vertical fin and stabilator leading edges; wheel wells; landing gear door interior surfaces; mail wheels; pitot tube).
The decal provided in the box is good in quality. It is mostly accurate in regards to the larger items, but less so in regards to various small stencilling. There is one issue, however: contrary to the Planet Models' instruction, the real XF10F-1 did not have the "NAVY" lettering on the upper right wing. There is at least one historic photograph proving this (see the source [1], page 20); I might also add that this conforms to the Navy's standard practice. Most of the Jaguar models on the Internet are inaccurate in this regard, which is a shame. Modellers should pay more attention to historic photographs, less to model kit manufacturers' recommendations.

3.3. Presentation
I am always trying to present an aircraft in its most typical surroundings. For the short-loved XF10F-1 this is definitely the Muroc Dry Lake. The dry lake bed is flat, so my diorama base is just a sheet of plastic which is painted accordingly. It must be noted here that the dry lake bed is a very special surface and is unlike to the sand you see on a beach or in a desert. In normal conditions the dry lake bed is very firm, so that aircraft and vehicles do not bog down, and neither do they generate the clouds of dust when rolling (see some photographs here: photo1photo2photo3).

As my Jaguar is in a "just landed" situation, I needed a pilot in the cockpit. My figure came from the set # 721120 produced by PJ Productions. The pilot's equipment is more or less accurate for the early post-war years; I only had to reshape the footwear of the PJ's figure, as the Navy pilots wore neat leather shoes and not some shapeless stuff molded by PJ.

The rather generic ground crewmen figure came from Italeri's "NATO Pilots and Ground Crew" set # 1246 (actually, it is my home-made customized resin copy since the original Italeri figures are made from polyethylene which is unworkable from the modelling perspective).

The pickup truck model represents a 1951 Ford F-1 (kit # 7020 manufactured by F4Models); it is painted Ocean Grey which was one of the standard colours used for the Navy ground support vehicles at that time. Here is a photographic proof (link) that Ford F-1 pickup trucks were indeed operated by the U.S. Navy.
 

4. Reference Data
[1] Grumman XF10F-1 Jaguar | Naval Fighters Series # 26 | Ginter Books, 1993.
[2] Basic information on the XF10F Jaguar in Wikipedia: link.

5. Notes
You can often see modellers declare that they won't build resin model kits, implying that resin is the reason for that self-abstention. They list a variety of reasons; one of those reasons is that supposedly the resin kits would warp and deform with time. Well, I have completed this model of the XF10F-1 Jaguar in November 2015; now it is November 2019. Exactly four years have passed, and the three landing gear legs, made entirely from resin (no metal inside them), that support the weight of the full-resin model, show no sign of deformation. The whole model today looks exactly the same as when it was finished.

15 October 2015

E-1B Tracer – RVHP Conversion Set Review

1. Introduction
Aircraft: Grumman E-1B Tracer
Model kit manufacturer / country: RVHP / Czech Republic
Scale: 1:72
Catalogue number: 7293
Release time: probably late 1990s

Basic information on the E-1 Tracer is available in Wikipedia (link) and will not be repeated here.

2. Kit
This is in fact a conversion set and not a full kit. It is intended to convert the S-2 Tracker model produced by Hasegawa (a very old one, first introduced in the 1970s) into the E-1B AEW variant.

2.1. Box
The box is compact (23 x 14 x 4 cm) and extremely sturdy. There is no other packaging though, and resin pats are left to rattle inside the box.

2.2. Instruction
Instruction is provided on one black & white A4 sheet. Assembly guidelines are given in a text-only form. Very little information on painting is supplied.

2.3. Resin Items
All parts are cast from pale cream resin. At first glance, the resin as such looks nice, but the quality of surface finish is in fact very poor: the parts are uneven in places and have multiple scratches as if they have been sandpapered (apparently, the manufacturer neglected to prepare the master kit surfaces properly before casting). The two parts comprising the radome do not fit together, leaving a wide gap. The fuselage halves diverge when aligned.
While the quality of parts can be assessed as poor, the accuracy and geometry is, unfortunately, even worse. The most characteristic feature of the Tracer, its radome, is fatally flawed. See for yourself on my comparison pictures, where the RVHP's parts are put against some historical photographs and the Google's satellite imagery of a surviving E-1B. The shape of the real Tracer radome is not only different in all aspects (planform, side view, front view), it is also much more intricate than the simple tear-drop / egg-shaped thing designed by RVHP
Other issues of this set comprise:
 - Total lack of small parts to make the radome support struts (5 in total), several Tracer-specific fuselage air scoops and smaller antennae.
 - Absence of accurate panel lines on the fuselage and the radome.
 - Absence of the vents on the radome underside and several smaller air inlets on the fuselage.
 - Simplified surface detail on the horizontal and vertical stabilizers.

One has also to keep in mind that the Hasegawa's S-2 Tracker kit, which is supposed to serve as a basis for this Tracer conversion, is itself very old, has raised panel lines and offers very austere detailing. Given this, the project of building something resembling an accurate model of the E-1B would require many months of dedicated and meticulous work that, among other things, will include scratch-building the radome – thus making obtaining the Czech conversion set scarcely worthwhile.

All in all, the RVHP's set leaves an impression that it has been designed basing on some sketchy drawings (from an old book or a magazine) rather than on any photographs of the real aircraft in question. Actually, this may well be the case if the set was created in the pre-Internet era by someone who had no chance to visit the U.S. and photograph / measure one of the very few surviving Tracers stored there.

3. Decal
One decal option is provided for the following aircraft:
 - BuNo 148921 / NP015. U.S. Navy, squadron VAW-111, USS Hancock (CV-19), 1973.
Basing on the historical photographs, the decal sheet has the following inaccuracies:
1) The exact shape and size of the bat artwork is questionable, as the only available historical photograph that proves its existence is taken at a rather oblique angle. It could be surmised that this artwork was a one-of-kind example specific for BuNo 148921, as historical photographs of other VAW-111 Tracers that are currently available do not exhibit any radome artwork whatsoever.
2) Inaccurate font of the vertical stabilizer "NP" code: there should be no cut angles on the P's.
3) Inaccurate font of the "8921" BuNo and the "015" modex: all characters should have 60° angles (not 45°).
4) Inaccurate BuNo cut-out on the vertical stabilizer maroon trim.
5) Inaccurate black arrow shapes: they should have straight, not curved sides.

What we see here is a decal that was apparently created basing on a drawing in a book (namely, USN Aircraft Carrier Air Units Volume 3 by Duane Kasulka, Squadron / Signal Publications, 1988) and not on historical photographs.

4. Alternatives & Aftermarket
As of October 2015 there is only one full kit of the Tracer on the market – the one issued by Mach2 (# 7229 / GP029). As can be seen from kit reviews (see link), the Mach2's kit has the same grossly inaccurate radome shape as does the RVHP's conversion set. A very old vacu-formed conversion set produced by Falcon (# 4600), unsurprisingly, also shares the egg-shaped radome with the RVHP and Mach2 offerings.

No aftermarket is made specifically for the Tracer. However, there is an R-1820 engine set by QuickBoost (# 72059) that is certainly applicable. In addition, there are two photoetched detail sets made by Eduard (# 72267 and # 72268) that are intended for the S-2 Tracker; certain parts from these two sets could be also of use.

5. Conclusion
Pro:
 - Nothing.
Contra:
 - Totally inaccurate radome shape.
 - Very poor quality of surface finish.
 - Poor fit of parts.
 - Poor surface detail: no proper panel lines on the fuselage and radome, no imitation of vents, inlets, hatches and lights on the fulselage.
 - Total lack of the Tracer-specific small parts: radome support struts, air scoops, various antennae.
 - Inaccurate decal.
 - High price (~$52 in 2005 at Hobbyshop.cz).

The conclusion is, therefore, as follows: we will have to wait until some manufacturer comes up with a new E-1 Tracer kit – and, hopefully, with an accurate one.

6. Reference Data
[1] Basic information on the E-1 Tracer in Wikipedia: link
[2] Good photo walk-arounds: linklink
[3] Some useful notes by Tommy H. Thomason: link
[4] S2F Tracker in Action | Aircraft in Action Series # 100 | Squadron/Signal Publications, 1990
[5] E-1B Tracer Standard Aircraft Characteristics sheet by NAVAIR (see link in source [1]).
[6] An example of flawed E-1 Tracer drawings: link

30 September 2015

HO3S-1 – Mach2 Model Kit Review

1. Introduction
Aircraft: Sikorsky HO3S-1
Model kit manufacturer / country: Mach2 / France
Scale: 1:72
Catalogue number: GP011
Release time: unknown

Basic information on the HO3S-1 helicopter is available in Wikipedia (link) and will not be repeated here.

2. Kit
2.1. Box
The box is a sturdy top-opener, 22 x 13 x 4 cm in size.

2.2. Instruction
Instruction is provided on one black & white A4 sheet. Typically for Mach2 kits, it gives a sketchy explanation of the building process and very little information on painting.

2.3. Plastic Parts
The kit contains two frames of light grey plastic parts. The quality of molding is poor, which is also, unfortunately, a trademark of Mach2 kits. Flash is abundant, and thickness of all plastic parts is excessive. Actually, the parts that are supposed to represent the cabin interior, landing gear, rotor head and rescue winch are so thick and so crudely detailed that the only way to obtain a realistically looking model would be to scratch-build all respective items, throwing the kit parts away.
The general shape of the kit appears to be more or less accurate. Accuracy issues include the following:
 - Unnecessary bulges on lower starboard and upper port side of the fuselage (a feature of Westland Dragonfly, not present on HO3S-1).
 - Inaccurate exhaust detail on fuselage port side (again, correct for Westland Dragonfly, not for HO3S-1).
 - Inaccurate panel lines on the main rotor pylon.
 - Grossly simplified and crude main rotor head.
 - Lack of distinctive stiffener plates on the tail rotor blades.
 - Excessive imitation of rivets on the fuselage (both sides) aft of the engine exhaust area. 
Basing on the reference data available from sources [1] and [2], it could be surmised that scalewise the kit is also acceptable. Here are some results of my measurements:
                              | Reference data    | Kit
Fuselage length       | 174mm               | 172mm
Tail rotor diameter    | 35.6mm              | 37mm
Main rotor diameter  | 203mm               | 194mm
Notable discrepancy in the main rotor diameter is most probably due to crude shape of the kit's main rotor head.

2.4. Clear Items
Unfortunately, clear plastic items are 1mm thick and not particularly transparent. Ensuring that the characteristic glass nose of the helicopter looks realistically would be a major undertaking.

3. Decal
There are two decal options provided:
A) U.S. Navy. BuNo unknown / UP32. Squadron HU-1. Early 1950s, off Korea.
B) French Naval Aviation (Aéronavale). BuNo unknown / 58S10. Squadron 58S (58 Escadrille de Servitude). 1952.

Variant A:
1) As can be seen from historical photographs, most HO3S-1 helicopters of the HU-1 had national insignia in 4 positions, whereas there are only 3 respective items on the decal. In any case, the national insignia decals are out of register (the red line not being centered on the white side bars) and therefore are only fit for a waste bin.
2) Available historical photographs indicate that HU-1 HO3S-1 helicopters adhered to the Navy's standard practice of placing a Model Name + Service Name + Bu No legend on the tail boom. There are no respective items in the kit's decal sheet.
3) The "Remove Chock" lettering on the decal is ridiculous. The correct text should have been, of course, "Remove Chute".
4) So far (as of September 2015) I was unable to find any historical photographs that would prove the existence of a HO3S-1 with the markings corresponding to those represented on the Mach2's decal sheet (UP32 code, checkered band and artwork).

What we see here is a decal that was apparently created basing on a drawing in a book (namely, USN / USMC Over Korea by Thomas E. Doll, Squadron / Signal Publications, 1988) and not on historical photographs.

Variant B:
National insignia and unit codes appear to be accurately represented on the decal.

4. Alternatives & Aftermarket
As of September 2015 there are no other model kits of this helicopter in production. In the past there have been kits made my Aerodrom (# EP-03) and MPM (# 72036 and 72126). Judging by available photographs, neither is significantly better then the Mach2's kit in terms of quality and detail. No aftermarket items are available either.

5. Conclusion
Pro:
 - Acceptable overall accuracy.
Contra:
 - Poor quality of molding, poor transparency of clear parts.
 - Minor accuracy issues – fuselage bulges; engine exhaust and air intake; panel lines.
 - Insufficient detail – cabin interior; landing gear; main rotor head; rescue winch.
 - Decals for the U.S. Navy option are out of register and inaccurate.
 - High price ($25 in 2013 at Hannants), considering the kit's size and quality.

As I see it, this kit could potentially be turned into an accurate model, but that would be a tremendous task requiring a lot of scratch-building. Advisable, therefore, only for those who are unable to live without an HO3S-1 in their collection. Others, I think, are better off waiting until this helicopter is kitted by some other manufacturer in a decent way.

6. Reference Data
[1] Basic information on the Sikorsky S-51 in Wikipedia: link
[2] Additional details on the S-51 and its derivatives: link
[3] Whirlybirds - U.S. Marine Helicopters in Korea | Lt.Col Ronald J. Brown | U.S. Marine Corps Historical Center, 2003 – available online here.
[4] Some notes outlining the S-51's service with the Aéronavale (in French): link
[5] Photo walk-around: link

PS: My advice is to be careful when looking at photo walk-arounds of museum exhibits: most of them are either USAF H-5's or Westland Dragonflies, and those have subtle yet visible differences when compared to the Navy / Marine HO3S-1 version.

4 July 2015

Grumman F5F-1 Skyrocket Model

1. Introduction
1.1. Aircraft
Grumman F5F-1 Skyrocket, hypothetical operational variant
U.S. Navy, VF-5
USS Yorktown (CV-5), January 1941

1.2. Story
The hypothesis behind my model (and attendant vignette) is as follows. The XF5F-1, after showing promising performance during initial tests, has found a strong proponent within the Navy. Testing and development of the prototype was hastened (unlike in reality) in such a way that all teething problems were addressed and by beginning of year 1941 six production F5F-1 aircraft were attached to fighter squadron VF-5, at that time flying F3F-3 biplanes, for operational evaluation. Embarked on USS Yorktown, the squadron went on a training cruise in the Pacific. My vignette shows a Fighting Five's F5F-1 preparing to launch from Yorktown's deck.

I believe my hypothesis to be technically feasible (at least much more feasible than various fancy jets and flying saucers of the Luft '46 persuasion) due to the following arguments:
- As an aircraft per se, the XF5F-1 was conventional. It was a low-wing cantilever twin-engined monoplane with retractable tailwheel-type landing gear and twin tail unit. There was nothing innovative or unconventional in its construction (apart from provision for anti-aircraft bombs that shouldn't be considered as serious in any case) to prevent it either from successfully passing through the test program or from entering service, should the green light be given to the project.
- As for the timing, in the 1930s and 1940s rapid progress from testing to squadron service was not out of the realm of possibility. For example, it took F6F Hellcat just 8 months to go from first flight to initial operational capability.
- Operational squadrons composed of different types of aircraft are not something unheard of. Such practice was fairly common during the 1930s (for example, VF-7 flew both F2F-1 and F3F-1 types as late as 1939).

1.3. Model Kit
XF5F-1 Skyrocket from MPM (kit # 72022), 1:72 scale.

2. Kit Review
My detailed review of the MPM's kit is available here.

3. Construction
3.1. Building
Although the accuracy of the kit is more or less acceptable out of the box, it really lacks details and requires quite a lot of wok to get a realistically looking model. I have added the following fully scratch-built items:
 - Landing gear well (engine nacelle) interior.
 - Landing gear legs and struts. 
 - Wheel well cover interior and hinges.
 - Propeller hubs.
 - Wingtip navigation lights and landing lights.
 - Dashboard and dashboard cover.
 - Pilot seat, control stick, pedals and some other miscellaneous items inside the cockpit.
 - Antenna wire.

In detailing my model I have also used some aftermarket items, namely:
 - Two resin R-1820 engines by QuickBoost (set # 72059).
 - Cockpit floor and side walls taken from the F4F interior detail set by TrueDetails (# 72455).

Then, bringing the model to a "definitive" short-nose version required the following modifications to be done:
 - Fuselage-to-wing fillets added.
 - Rudder hinge lines revised (from straight ones to stepped ones).
 - One long side-mounted exhaust stack per engine replaced with 9 smaller exhaust stacks.
 - Small air intakes removed from the engine cowlings' lower lips.

Lastly, I've made a number of modification to make the model look like a hypothetical operational fighter:
 - Machine gun barrels, gun camera aperture and collimator gun sight added.
 - Gun chutes cut out in the lower wing.
 - Imitation of air-to-air bomb bay doors removed.

3.2. Painting & Markings
Painting and markings have been done in accordance with the standard U.S. Navy specification applicable in the pre-war years. Top wing surface is Chrome Yellow while other surfaces are Aluminium / Silver. Bright Red tailplane designates a unit based on USS Yorktown and Willow Green trim marks a leader of the 5th section in the squadron. All decals came from by box of spares.

I deviated a little from prescribed standards in the following aspects:
 - Standard does not specify any borders for section colors. However, in practice many squadrons did apply white or black borders to section trim (see photo), and I have attired my model in this fashion too.
 - Propellers usually had manufacturer logos on each blade. Actual XF5F-1, however, sported rather peculiar propeller logos which I couldn't find on any decal sheet (and the out of the box decal does not include them). On the other hand, historical photographs prove that some aircraft serving with operation units did not carry any propeller blade logos (see photo).

This is the first aircraft model that I have finished after an inexcusable 10+ year gap and my painting skills are not as I would wish them to be. There are some small painting defects and imperfections and I am not completely satisfied with my work.

3.3. Presentation
For me, the presentation of this model was defined by two pre-requisites. Firstly, I wanted to show my hypothetically operational F5F-1 on a carrier deck. Secondly, I did not want to fold the wing (as there is no photographic evidence to understand the particulars of the wingfold mechanism). These conditions leave you with only three options: the aircraft must be either launching or taxiing to launch or landing. I chose the launch variant for my vignette.

An old set produced by LandingZone (# 72001) represents the deck of Yorktown or Essex class carrier very well. It is too small to house a Skyrocket, though. Therefore I made resin copies and combined them to get a base of required dimensions. Photo-etched tie-down strips came from an excellent set produced by White Ensign Models (# 7209).
I used wonderful pre-ware photographs of USS Enterprise (see photo1photo2) as a reference when paining my deck.

Then, I needed a pilot. The choice of seated pilot figures is extremely limited. In fact, I could find (as of early 2015) just one set only – "US Pilots Seated (WW2)" by PJ Productions (# 721120). Unfortunately, pilot figures in this set are inapplicable for the World War II era as their headgear is totally wrong: they have hard plastic helmets with integrated sun visors which neither of the U.S. Armed Services used before the advent of the 1950s. Navy pilots of the 1940s wore soft leather helmets with two-piece (and later one-piece) aviator goggles.

So, to get myself a historically accurate pilot figure I had to find a new head, and that came from the CMK's set of standing USN pilot figures (# 72115). I also had to reshape the footwear of the PJ's figure as Navy pilots wore neat leather shoes and not some shapeless contraptions designed by PJ (which resemble present-day uggis, the ugliest footwear ever invented). As a reference for painting the pilot figure, I used a number of period color photographs such as these: photo1photo2photo3photo4.

Lastly, I needed some flight deck crew figures. Here, again, the choice of historically accurate figures is poor. Figures in well-known Fujimi's set ("Flight Deck Crew & Carrier Tractor", # 35001) represent crewmen in attire that came into use in the 1970s: most of the Fujimi's figures wear multi-pocketed vests and all of them wear hard plastic headgear with headsets and one-piece ski-style goggles. Whereas flight deck crewmen of the 1940s wore jeans (classic denims), jerseys or shirts and soft fabric caps (see example here and here). WW2 USN crew figures offered by Attack Squadron (set # 72011) are attired accurately but have "formal" headgear that was rarely, if ever, worn by flight deck crewmen while attending to airplanes.

Eventually one of my figures came from the already mentioned Fujimi's set and the other one from Italeri's "NATO Pilots and Ground Crew" set # 1246, but both underwent "head surgery" to achieve historical accuracy.

4. Reference Data
[1] Basic information on the XF5F in Wikipedia (link)
[2] Grumman XF5F-1 & XP-50 Skyrocket | Naval Fighters Series # 31 | Ginter Books, 1995
[3] Grumman F7F Tigercat | Famous Airplanes of the World Series # 100 | Bunrin-Do, 1978
[4] Grumman F7F Tigercat | Monografie Lotnicze Series # 1 | AJ-Press, 1991

25 May 2015

Mk.82 Snakeye Bomb - Model Kits Review

1. Introduction
The Mk.82 bomb is, beyond doubt, an archetypical weapon of the U.S. Navy and Marines strike aircraft of the 1960s and 1970s. Bullpup or Shrike missiles may have looked cooler and guided bombs may have gathered more fame and publicity, but Mk.82 slicks and Snakeyes found incommensurably wider use. Thus if you want a model of an archetypical USN or USMC aircraft of the Vietnam war era in a ground attack configuration, such model should have a load of Mk.82s. And whereas a slick Mk.82 presents no particular difficulty to modellers and is well represented in a number of kits, the Mk.82 Snakeye with its very complex and intricately shaped tail fin unit is definitely not an easy thing to either mould in plastic or to scratch-build. 

Fortunately, some resin aftermarket sets have appeared recently to help us tackle the Snakeye. A couple of such sets are reviewed here and compared against the older plastic kit parts.

Note that this review article only concerns the "classic" Snakeye retarder tail that was in use with the Mk.82 bomb during the 1960s - 1990s timeframe (and applicable to such USN / USMC aircraft as A-1, A-4, A-6, A-7, F-8 and F-4). It is not to be confused with the modern version of the high-drag tail fin unit (see [3] in the Reference section).

2. Kits
2.1. Hasegawa
For many long years the only aftermarket aircraft weapon sets available on the market have been those made by Hasegawa as part of their "Aircraft Weapons" series. There was simply nothing else if you wanted additional weapons for your aircraft model.

The "U.S. Bombs & Rocket Launchers" (cat. #  X72-011 / 35001) set was released in 1987, and back in those years it was an excellent product. But 28 years later we see that the most remarkable part of the real Snakeye – its retarder tail fins – is represented very crudely. It looks like several rectangular pieces of plastic and not like the real thing at all. There's no nicer way to state it.

I will note, however, that the set contains:
 - Decals for the Mk.82 bobms as well as an excellent instruction sheet complete with the paining guide.
 - Many other types of ordnance which are out of my review's scope.

2.2. Academy
I chose the Academy's F-8E Crusader kit (cat. # 1615) for this review because:
 a) this is a relatively modern kit (released in 2004),
 b) the Crusader itself is accurate and beautifully detailed (actually, I believe it to be one of the best 1:72 models of a USN jet),
 c) it includes Mk.82 Snakeye bombs.

However, when we take a closer look at the Academy's representation of Snakeye bombs we see that they give no advantage over the Hasegawa's set at all. Although the bombs from the Korean manufacturer are definitely not the exact copies of the Hasegawa's items (e.g. check the thickness of tail fins), they are in exactly the same league in terms of accuracy and detail. Enough said.

2.3. Kora Models
In 2014 Kora Models from Czech Republic has released a flood of resin Mk.82 Snakeye sets. As far as I can see there are more than 15 sets which differ by the number of bombs and the combination of TER and / or MER racks included.

Curiously enough, the manufacturer does not state on its packaging the exact number of bombs that are included, instead using generic terms like "light load", "medium load" or "heavy load". How difficult is it to put a clear label - "Contains X items" - on the packaging, I wonder?...

I have obtained a set designated as # DSM72009 and containing 12 bombs and 2 MER racks. All items are cast in very pale cream resin. Photographing them is not easy, therefore for the purposes of this review I have covered one bomb and one MER rack from the Kora's set in grey primer.

Looking at the Kora's representation of the Mk.82 Snakeye we see that:
 - Firstly, the quality of casting is dreadful (no, I didn't deliberately pick the worst item - all bombs in the box are exactly the same).
 - Secondly, although there are more fine details than on the 25+ year old Hasegawa's item, those details are inaccurate. Look at the photographs of the real Snakeye and see for yourself.

Instructions on painting the bombs are provided, but decals are not. You are supposed to find third party decals (as hand-painting the 0.3mm tall yellow stencilling on each bomb case is hardly feasible).

But this is not all. The set reviewed here also contains MER racks, so why not comparing them with the venerable items from Japan? Look at my pictures then. I don't know about you, but what I see is a nearly exact copy of the 25+ year old Hasegawa's item. The only thing added by Kora is the poor quality of casting.

After looking closely at this particular set I'd say that the guys at Kora Models should probably remove the red "High Quality" lettering from their product packaging: at the moment it looks like a cruel joke.

2.4. North Star Models
North Star Models has released its Mk.82 Snakeye set in 2014, and in 2015 decal has been added to the kit. The kit (# 72082) is very sophisticated and includes the following:
 - Resin parts for building six Mk.82 Snakeye bombs.
 - For each bomb, a choice of "noses" that includes: standard (short) fuse, 36-inch fuse extender and two types of inert (fuseless) nose cones.
 - Photo-etched parts to imitate fuse arming propellers.
 - Decal with stencils and nose rings for both live and training (inert) variants.
 - Instruction sheet with paining guide.

The bomb's trademark intricately shaped folding fins are astonishingly detailed. Judging by available historical photographs, the accuracy is excellent: even the tiny holes in each of the four fin plates are faithfully represented.

A couple of further notes, though:
 - The fins are so delicate that they can be bent just by touching them with your fingertips. But the nice thing is that they bend rather than break (a good choice of resin, North Star!)
 - Bending the minuscule photo-etched parts is not an easy task.

3. Conclusion
I think that my comparison pictures suffice to declare that we have a clear winner. The Snakeyes from North Star Models are as accurate as it is possible in the 1:72 scale and the quality is absolutely flawless.

And the product from Kora Models just offers one more prove (if anyone needs it) that words like "aftermarket" or "resin detail set" do not necessarily mean "must have". I personally do not think that I will be buying anything else produced by Kora Models.

The difference between the North Star's and Kora's products is so vast that in my opinion the price does not even enter the equation.
However, for those who are interested here's the pricing:
 - North Star Models kit # 72082 (6 bombs with decals) = E 8.01 at the manufacturer's site
 - Kora Models kit # DSM72001 (6 bombs) = E 9.00 at LF Models shop, E 9.79 at Hannants shop

4. Reference Data
[1] Basic information on the Mark 82 bomb in Wikipedia: link
[2] "Classic" Snakeye retarder tail (Mk.15) in the open position: photo
[3] Modern version of the high-drag tail fin unit that is not to be confused with the 1960s - 1990s "classic" Snakeye: photophoto

11 May 2015

U.S. Navy Air-to-Air Missiles - Model Kits Review

1. Introduction
An aircraft model kit box does not always contain all the weapons that a modeller would like to equip the resulting model with. This is a well known fact, and another fact is that out of the box weapons are not always excellent in terms of detail and accuracy. For many long years the only aftermarket aircraft weapon sets available on the market have been those made by Hasegawa as part of their "Aircraft Weapons" series that was launched in 1987. There was simply nothing else if you wanted additional weapons for your aircraft model.

In 2014, the dam burst: several manufacturers have released a wealth of aftermarket missile sets. Eduard is offering AIM-9B, D and M/L Sidewinders, AIM-7E and M Sparrows, AIM-54 Phoenix, AGM-12B and C Bullpups, AGM-45 Shrike, AGM-78 Standard ARM and AGM-88 HARM. Attack Squadron has released AIM-9X Sidewinder, AGM-45 Shrike and AGM-88 HARM. And finally, North Star Models is here with their AIM-54 Phoenix and AGM-65 Maverick.

Reviewing all missile kits would be an enormous task. So in this article I focus on air-to-air missiles in service with the U.S. Navy since the early 1950s and until the late 1970s. Some relevant aftermarket items are compared against out of the box weapons and checked for accuracy.


2. AAM-N-2 Sparrow I

2.1. Application
The Sparrow I has seen a rather brief period of service with the U.S. Navy. These are the aircraft that carried this missile operationally:
 - F3D-1M & -2M Skyknight   [ ~1954 ]
 - F7U-3M Cutlass                [ ~1956 ]
 - F3H-2M Demon                 [ ~1956 ]
Year of operational capability of this missile with a particular aircraft type is given in square brackets.

2.2. Kits
As of May 2015, there are no aftermarket sets for this particular missile and only three model kits of aircraft that did carry it operationally: Fujimi's F7U-3M Cutlass (# 27012), Sword's F3D-2 Skyknight (# 72074) and Emhar's F3H-2 Demon (# 3001). Of this, only Fujimi's F7U-3M contain Sparrow I missiles. One of those is shown on my photos.

Sources like [2] and [3] do not agree in terms of dimensions of the actual missile. Below, I list data from sources [2] and [3] converted to the 1:72 scale as well as measurements of the Fujimi's item:
                 | Source [2] | Source [3] | Fujimi kit
Length       | 51.9mm     | 52.9mm    | 47.0mm
Wingspan  | 13.0mm     | 12.7mm    | 12.0mm
Diameter   | 2.8mm       | 2.8mm      | 2.4mm

Basing on this data as well as on the analysis of the available historical photographs (see source [3] for detailed photos) this is the assessment of the kit item:
 - At least 5mm shorter than it should be, with wingspan and diameter also slightly smaller than necessary.
 - Prominent fairings (most probably wiring conduits) that run along the missile body from wing leading edge to the tail end are missing.
 - Small diamond-shaped wing root fairings are missing.
 - No details in the exhaust area.


2.3. Painting & Markings
Source [3] states that operational AAM-N-2 missiles were painted black. Black is a rather peculiar colour for a missile, and one would think that Sea Blue, the Navy's standard overall colour of the time, should have been more appropriate. But so far I have only seen black & white historical photos (example) of operational Sparrow I's, therefore I cannot be sure in my suspicions.

As for those missiles used during the development stage and by non-operational units (such as VX-4), there seem to have been at least two rather elaborate paint schemes:
a) Day-glo Red body, wings and fins. Nose section and longitudinal fairings painted flat black, wide black bands aft of wing and fins. Silver (natural metal) needle point. See photo.
b) Day-glo Red wings and fins. Flat black body with silver (natural metal) needle point. Proximity fuse areas painted white. Aft of proximity fuse area, wide olive drab band with yellow borders. Black stencilling on the olive drab band and white stencilling on flat black body aft of the band. See photo.

2.4. Conclusion
Correcting the kit item would require some major surgery; I would wait for an aftermarket Sparrow I to appear.

2.5. Reference Data
[1] Basic information on the Sparrow in Wikipedia: link
[2] More details (including dimensions) on designation-systems.netlink
[3] Very useful notes on Sparrow I by Tommy H. Thomason: link


3. AIM-9B & D Sidewinder

3.1. Application
The Navy's first Sidewinder, the AIM-9B, was operationally carried by the following aircraft types:
- FJ-3M, -4 & -4B Fury  [ 1956 on FJ-3M ]
- F9F-8 Cougar             [ 1957 ]
- F3H-2N & -2 Demon    [ 1957 ]
- F4D-1 Skyray             [ 1957 ]
- F2H-3 & -4 Banshee    [ ~1959 ]
- F11F-1 Tiger               [ 1957 or 1958 ]
- F-8 Crusader              [ 1957 or 1958 ]
- A-4 Skyhawk              [ 1960 or earlier]
- F-4 Phantom II            [ 1960 ]
- A-7 Corsair II              [ 1967 ]
Year of operational capability of this missile with a particular aircraft type is given in square brackets.

Subsequent Navy Sidewinder variants included:
 - The radar-homing AIM-9C. Although it did become operational, it was a rarity. To the best of my knowledge, it is not kitted.
 - The improved AIM-9D, introduced in 1965-1966 and easily distinguished from the B variant by its pointed nose. It was used operationally by Crusaders, Phantoms, Corsairs and probably by Skyhawks still assigned to VSF fighter squadrons.
 - The slightly longer AIM-9G (1970) and improved, although externally identical, AIM-9H (1972). These variants saw service with such types as F-8, F-4, A-7 and F-14.
AIM-9L and all later Sidewinders are beyond the scope of this article.

3.2. Kits
I've picked a number of "representative" plastic Sidewinders from my collection of U.S. Navy jet model kits and compared them with the recent resin sets made by Eduard Brassin. On the picture below the samples are numbered as follows:
AIM-9B:
 1) Hasegawa F9F-8 Cougar kit # 01619
 2) Hasegawa F11F-1 Tiger kit # 00601
 3) Fujimi A-7E Corsair kit # F9
 4) Tamiya F4D-1 Skyray kit # 41
 5) Eduard AIM-9B set # 672036 (contains 4 missiles, $6.90 per set)
AIM-9D:
 6) Italeri F-14A Tomcat kit # 128
 7) Academy F-8E Crusader kit # 1615
 8) Eduard AIM-9D set # 672043 (contains 4 missiles, $6.90 per set)


As you can see, the older plastic Sidewinders are hopeless. Wing and canard planforms on exhibits # 1, 2, 3 and 4 are all incorrect (interestingly, they are all different, even the two items made by Hasegawa), so the question of wings and canards being too thick (0.7mm) does not really arise. From those out-of-the-box Sidewinders that I have in my collection, the one made by Academy (item # 7) is the most accurate, but still its wings and canards are way too thick and the raised "panel lines" are a bit too grotesque.

Eduard's item compares to this very favourably. Canards are photo-etched and main wings are very thin (0.3mm) resin. Their planforms are accurate, and even the Sidewinder's trademark rollerons are faithfully represented. Photo-etched parts add detail to the rocket motor exhaust area and separate resin parts are provided to imitate protective caps for the seeker heads. These caps are an extremely useful addition: if your model shows an aircraft that is not yet preparing for takeoff with the pilot in the cockpit, then the extremely delicate IR heads of Sidewinders must (yes, must!) be covered by protective caps.

3.3. Painting & Markings
No Sidewinder-containing aircraft model kit that I have seen comes with decals for said Sidewinders. You are supposed to paint the bands and the stencilling yourself. Instructions in older kits just tell you to paint the missiles white overall; in newer kits, instructions suggest more accurate paint schemes.

Eduard's set contains finely printed decals and a good painting and markings diagram. It aligns very well with what we see on historical photographs (example), and the only thing that I'd add is that the AIM-9B's rollerons should be natural metal, not white.


3.4. Conclusion
Now we have excellent AIM-9B and -9D far surpassing out-of-the-box items. Thank you, Eduard!

3.5. Reference Data
[1] Basic information on the Sidewinder in Wikipedia: link
[2] More details (including dimensions) on designation-systems.net: link
[3] Very good photos of a preserved AIM-9B: linklink


4. AIM-7 Sparrow III

4.1. Application
Aircraft that carried the Sparrow III operationally include:
 - F3H-2 Demon       [ 1958 ]
 - F-4 Phantom II      [ 1960 ]
 - F-14 Tomcat         [ 1974 ]
 - F/A-18 Hornet       [ 1983 ]
Year of operational capability of this missile with a particular aircraft type is given in square brackets.

The sources that I have seen do not mention the existence of any external differences between the C, E and F variants, except the statement that the E-2 variant had "clipped wings". The AIM-7M variant has entered production in 1982 and is out of scope of my article.

4.2. Kits
As with Sidewinders, I've picked a number of "representative" plastic Sparrows from my collection and compared them with the recent resin set from Eduard Brassin. On the picture below the samples are numbered as follows:
 1) Emhar F3H-2 Demon kit # 3001
 2) Hasegawa F/A-18C Hornet kit # 00438 / D8
 3) Italeri F-14A Tomcat kit # 128
 4) Fujimi F/A-18C Hornet kit # 72157 / F46
 5) Eduard AIM-7E set # 672030 (contains 4 missiles, $8.90 per set)
 

Unfortunately, each one of the older plastic Sparrows (items # 1, 2 & 3) is basically a pointed cylinder with 8 flat triangular shapes stuck to it, although Hasegawa attempted to add a hint of volume to wings and tailfins. Fujimi (item # 4) has tried to offer something more sophisticated but botched up the job by introducing "panel lines" to wings and tailfins and inaccurate box-like wing root fairings.

The shape of the real Sparrow III is more sophisticated; in particular, the following features are clearly seen:
 - 3 prominent wiring conduits running along the missile body.
 - Diamond-shaped wing root fairings as well as more box-like tailfin root fairings.
 - Lozenge cross-section of wings and tailfins.
 - Rocket motor well (usually kept closed on Sparrows held in storage).

All these features are very well represented in the Eduard's set. Rocket motor well should have been a bit deeper, but this is easily corrected.

4.3. Painting & Markings
The only decent out-of-the-box decals for Sparrow missiles that I have seen are those included into the Academy's F/A-18C kit (not covered by this review as it presumably offers newer AIM-7M or -7P Sparrows). Other Sparrow-containing boxes that I have just leave the fashioning of coloured bands and stencilling to you.

The Eduard's set contains accurate decals and adequate painting & markings instructions

These instructions could benefit if the following facts are listed there:
 - Two blue bands on the missile body mark an inert round. Yellow and red bands indicate a fully live round – live warhead and live rocket motor.
 - White missile body with light grey nosecone is a paint scheme that was applied to Sparrows up to approximately mid-1980s (examples: link, link). In later years Sparrows were painted light grey with white nose cones and dark grey wings and tailfins (examples: linklink).
 - Markings suggested by Eduard are only applicable for the 1970s and early 1980s: throughout the 1960s Sparrows sported serial numbers painted in very large block letters close to the nosecone (see example), and later Sparrows painted in light gray seem to have much more of small letter stencilling on their bodies (see example) than available on the Eduard's decal sheet.

4.4. Conclusion
Just as their Sidewinders, Eduard's Sparrow set surpasses all out-of-the-box items in accuracy and details. Modellers, however, are advised to do their own research in regards to painting and markings, and to base this research on historical photographs (and not on those taken in museums).

4.5. Reference Data
[1] Basic information on the Sparrow in Wikipedia: link
[2] More details (including dimensions) - link and link


5. AIM-54 Phoenix

5.1. Application
Only one type of aircraft has carried the Phoenix operationally, and that is of course the F-14 Tomcat. Two production versions of the Phoenix, AIM-54A and C, have no external differences and therefore can be considered identical from a modeller's point of view.

5.2. Kits
The best Tomcat kit, the one from Hasegawa, comes weaponless (as is Hasegawa's practice with some of their aircraft kits), so the only plastic Phoenixes that I have are the ones from an elderly Italeri's kit. They are generally accurate shapewise but do not offer anything in the way of detail.

The new resin set manufactured by NorthStar Models (# 72032) replicates the surface detail of the real Phoenix missile very well. The issue is with the wings and tailfins: they are too thick (0.8mm for wing leading edge and trailing edge, 0.7mm for tailfins), as thick as the Italeri's plastic. For more realistic appearance tailfins should have been photo-etched metal while resin wing parts should have been made thinner: looking at the Eduard's Sidewinder we know that it is technically feasible.


5.3. Painting & Markings
NSM's set includes finely printed and accurate decals, but provides no advice on painting the missiles. So here it comes:
 - Four blue bands on the missile body mark an inert round. Two yellow and two red bands indicate a fully live round – live warhead and live rocket motor.
 - Up to the early 1990s AIM-54's were painted Insignia White (FS37875) with Light Ghost Grey (FS36375) nosecones. In later years the paint scheme was reversed and Phoenixes became grey with white nosecones. Regardless of the time period, rocket motor well was dull red with a flat black ring around it.

5.4. Conclusion
NorthStar Models has produced a very good item for your Tomcat model. However, the competing set from Eduard Brassin (# 672029) may prove to be even better while being less expensive ($8.90 vs. the NSM's $12.75).

5.5. Reference Data
[1] Basic information on the Phoenix in Wikipedia: link
[2] More details (including dimensions): link
[3] Some excellent collections of F-14 Tomcat photos in Wikipedia that show you the painting and markings of operational Phoenixes: linklinklink